Fiber terminations are tedious and they tend to be fragile. It’s best to ensure that your painstaking work is kept neat and safe.
The technique I employ to store fiber in a splice tray is similar to coiling up a rope.
- First, if the tray is to take multiple tubes, keep the tubes, their associated cores and pigtails separate and labelled at the connectors
- Secure the tube(s) in the tray with a small cable tie keeping it firm so that the tube will not slip out
- Lay the cores of the first tube around the inbuilt raceway of the tray, starting from the tube working your way towards the splices.
- Secure the splices in their holders and then repeat step 3 and 4 for the next tube, keeping the pigtails out of the way.
- Lay the pigtails together in the same way, starting from the splices moving towards the connector end, exit the splice tray and secure with a cable tie on the exit.

The aim is to be smooth, neat and patient. Here are some extra tips that may help.
Fix the cable in place
When entering the FOBOT the fibre cable should be glanded, however due to the stiffness of the cable any mechanical forces such as inadvertent pushing and pulling can travel a long distance, so it is best advised to screw the fibre glass structure into the FOBOT with the provided termination screws to ensure your terminations are not disturbed.
Avoid kinks in the tube
The tube being the insulation that is bundled in with the structure of the cable but containing multiple fiber cores (usually 6 or 12 per tube), it carries the fiber from the breakout of the cable into the cassette, be mindful of the bend radius as it turns into the cassette, leaving enough length is key to this. Be aware that while the cores are insulated here, they are still quite fragile, as I found out the hard way with the slip of my screwdriver (of course it happened after I had finished terminating).

No tight bends
Once in the cassette avoid any tight bends or turns, no 180’s. If a core is shorter than the rest due to accidents or difficulties when splicing, simply move it around or place it in a different slot until it works itself out. The cores should follow the cassettes inbuilt curves like a race track, if required it is okay to run through the centre of the cassette as long as it smoothly enters the slots or outer track.
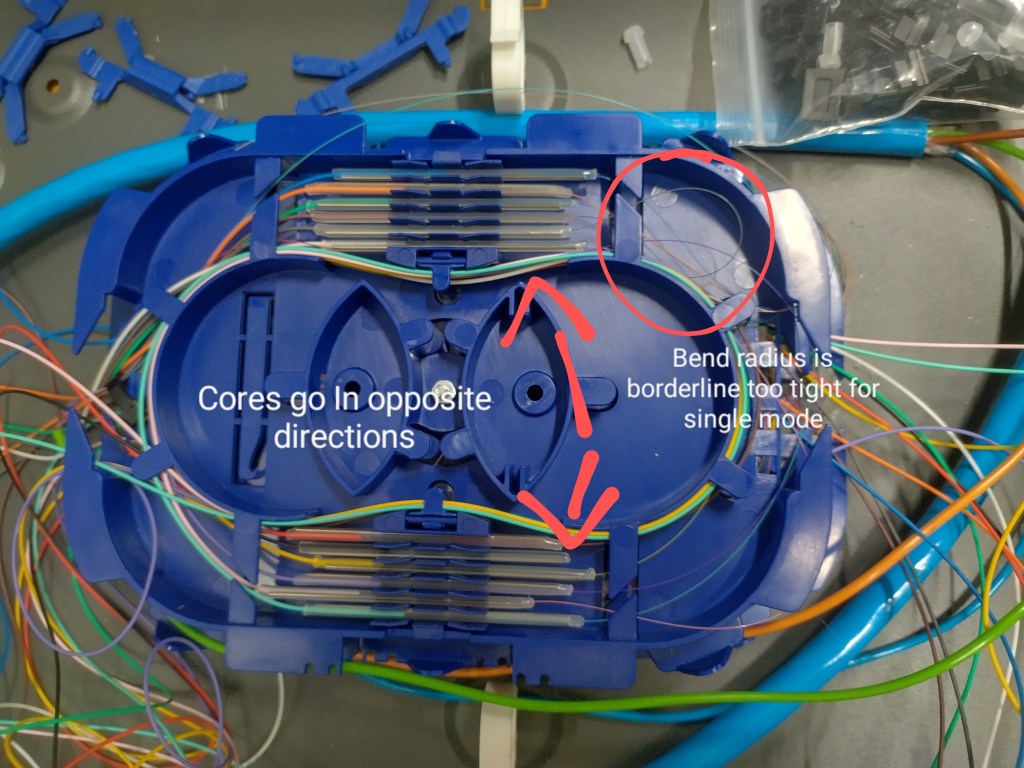
A bend like that above will likely fail a test from an OTDR. Keeping cores in one direction is a matter of preference, however I find it easier to keep my cores neat and avoid silly bends if I keep them going in the same direction. Ensure that one set of cores is kept longer than the other so that it will reach the opposite slots. After stripping off the tube, measure out the length of the fiber cores using the splice tray, if the tray is setup like the one above and half your splices will have to be placed on two opposite sides of the tray then cut one set of cores half a tray length longer or shorter to account for this prior to splicing.
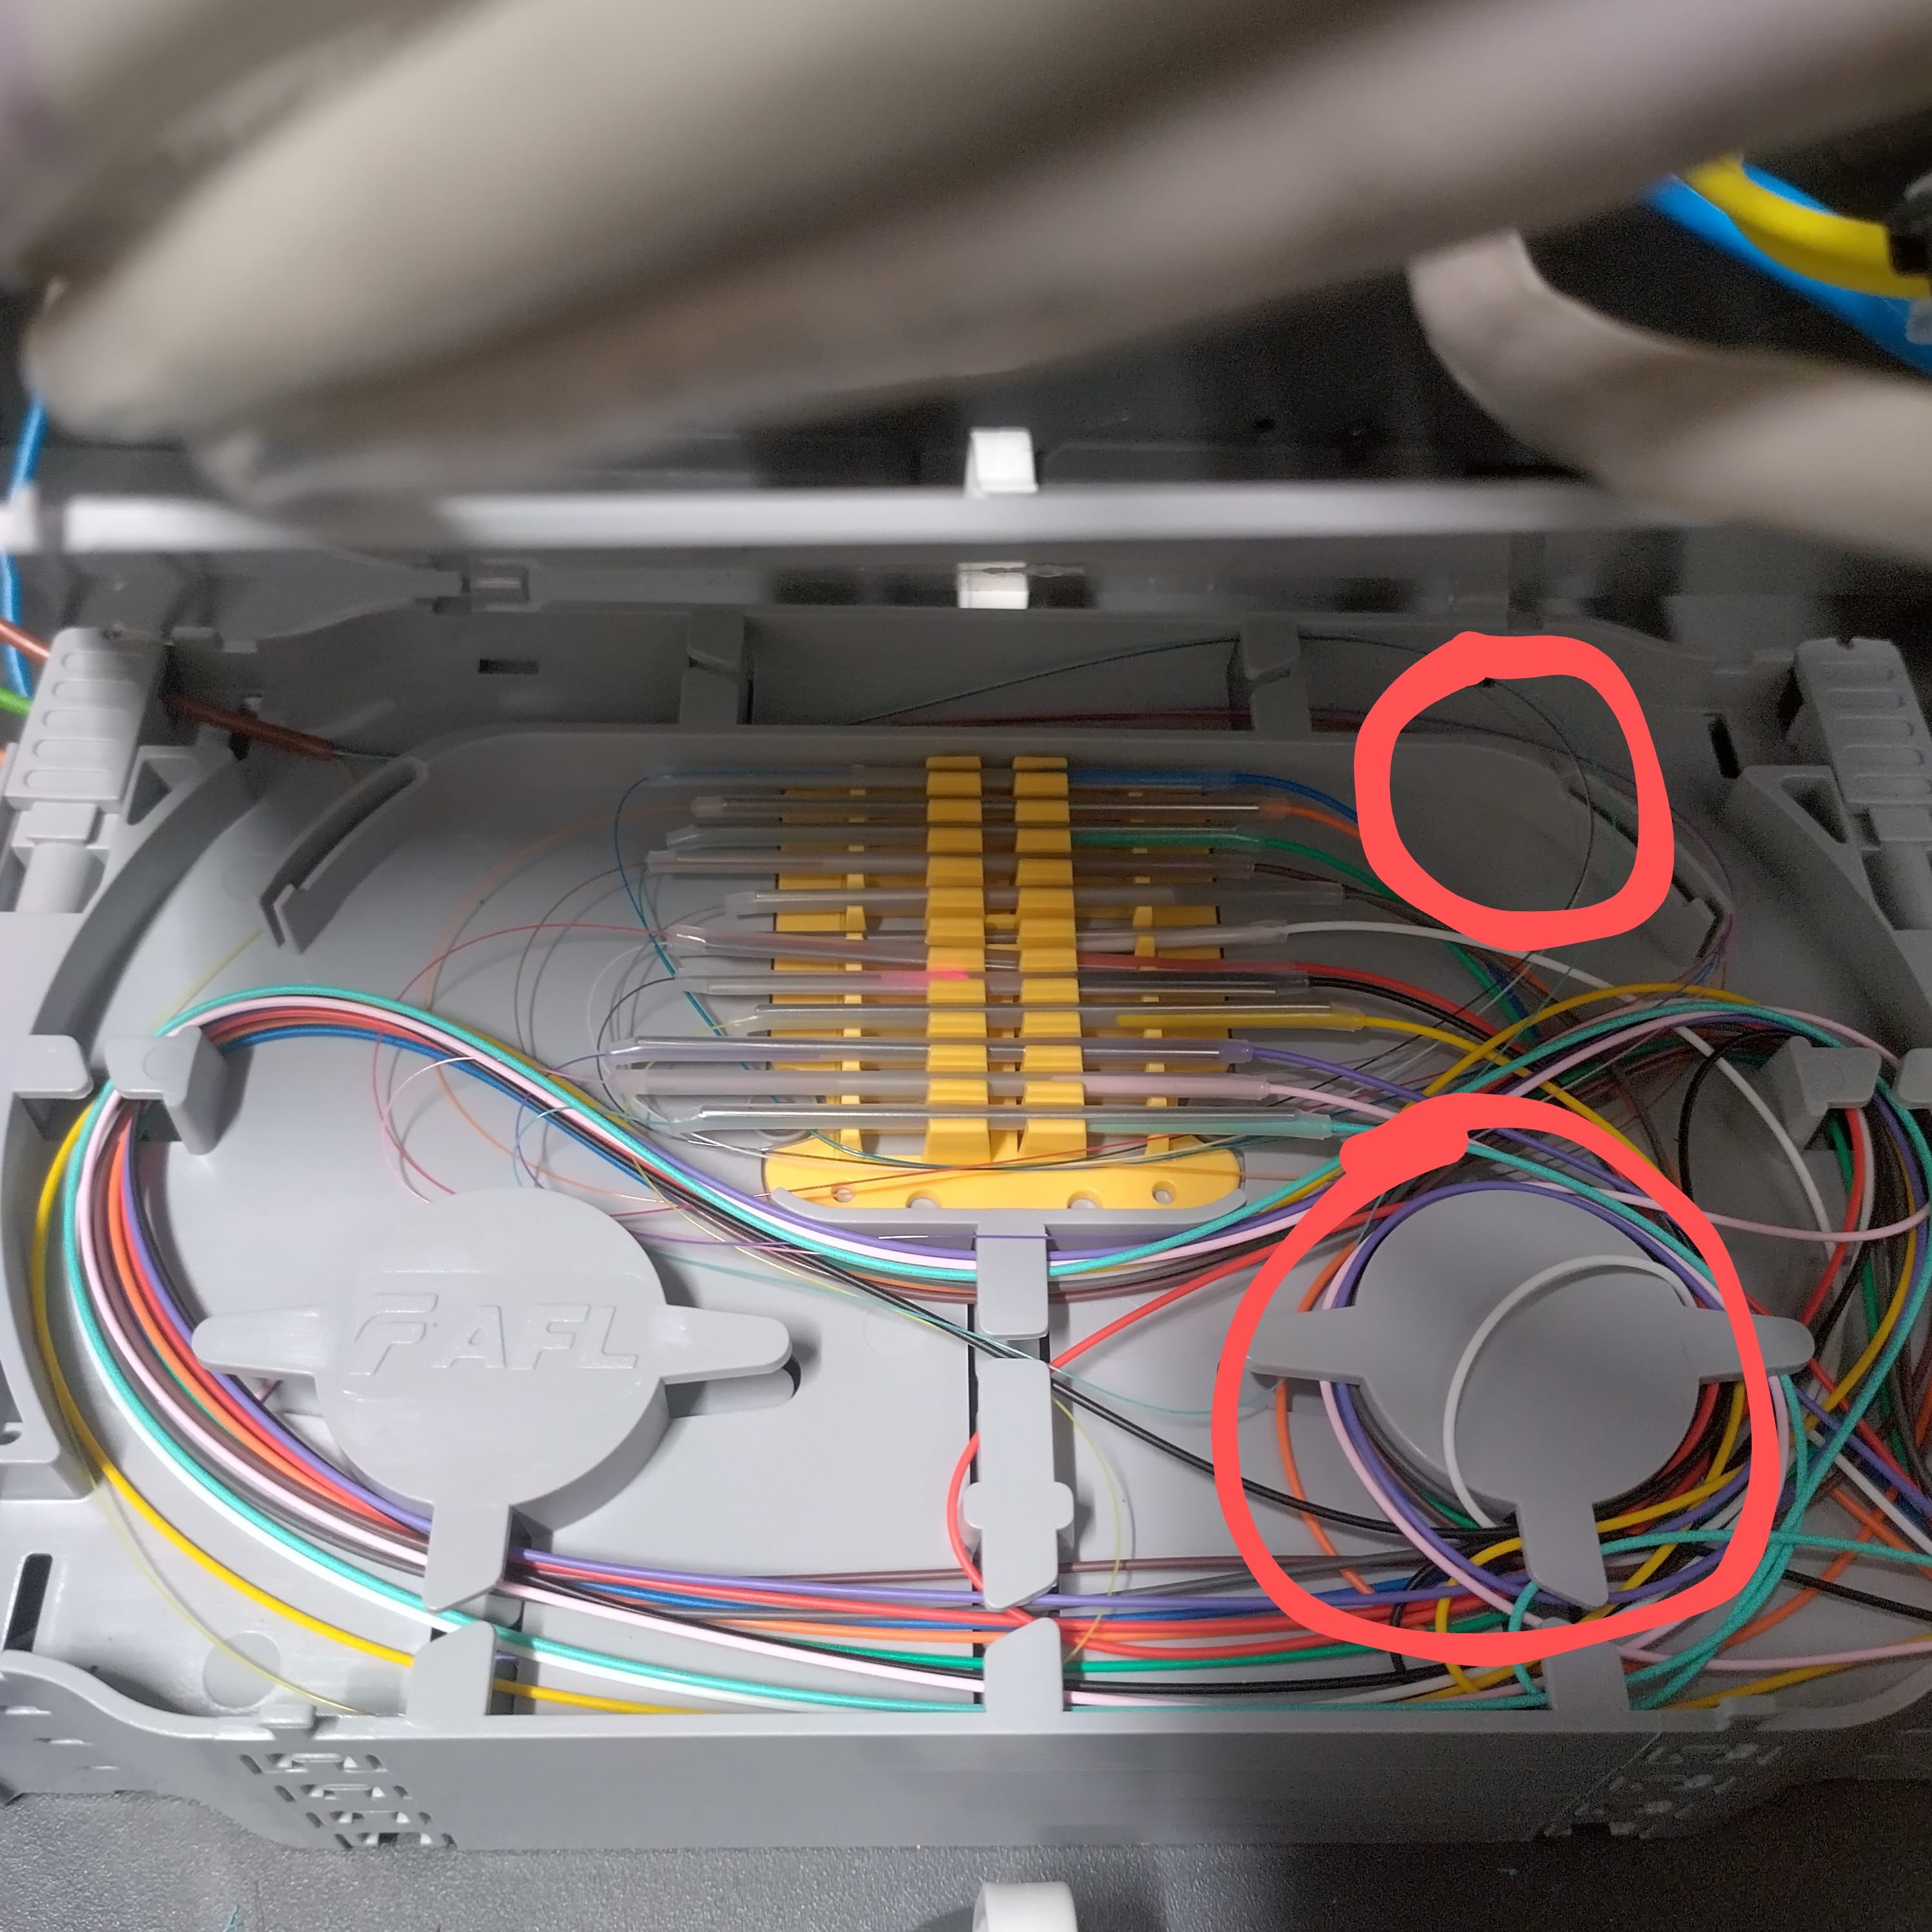
Cores jammed in the cassette
There are many flat surfaces of the splice tray that will sit flush with the lid. It’s possible that a core may get trapped between those two surfaces and be crushed or it’s performance reduced once the lid is closed.
Take care when placing the heatshrunk splices so that the fiber near the end of the heatshrink is not caught and bent against a hard surface, this can create a sharp bend easily and potentially damage the fiber.
Rushing
Do not feel the need to rush and fret, keep your movements smooth and deliberate. Not only will the product be neater and perform better, any accidents could lead to a much higher time cost than if you had just taken your time in the first place.
That concludes this post, I hope you enjoyed and found it useful.
